What follows here is a quick guide to the way that I paint. It is not definitive, does not cover many techniques, and is not overly flashy.

When I refer to this style, I often call it 'table-ready', because it allows me to quickly paint a large group of models that look good on the tabletop. On closer inspection, you may see that lines aren't straight, highlights aren't smooth gradients, and spots may be missed. I think this is all totally fine when it comes to miniatures. Unless I am painting pieces for competition or display, table-ready is my default paint mode.
One quick note before starting. I use a wet palette, which can be made by placing a square of paper towel in a flat tupperware container, adding water, and placing a sheet of baking parchment on top. Water is pulled up through the parchment and keeps paints moist. It also allows for dilution and smooth blending of colours. Nearly all paints that come out of a paint pot should be diluted to some degree. It may take you a bit to become familiar with the consistency you prefer the best, but experiment a bit and find out for yourself.


The steps for table-ready painting are the same ones that Games Workshop advocates for beginner painters:
1. Prime
2. Basecoat
3. Wash
4. Drybrush or Highlight
5. Finishing
Many experienced painters scoff at drybrushing, and in some cases, even the use of washes. I think this is nonsense, as these techniques provide a consistent and easily achievable quality. Of course, many painting techniques can be integrated with this process or swapped out entirely, but this basic formula will help you create a good looking model with relatively little practice.
1. Prime
Priming is a relatively simple process, and most hobbyists will suggest using a GW model primer to get started. I usually just use whatever cheap flat primer I can pick up at the hardware store. It's cheaper, and nearly identical in practice. I also like the wide range of colours that traditional spray paint can come in. If you are painting a miniature that is mostly just one colour, you can prime it that colours to save time!
In the winter, I usually use acrylic craft paint from the dollar store. This stuff is dirt cheap and comes in virtually any colour. Just brush it on every surface and allow it to dry to make sure you got good coverage. Sometimes it feels a bit grainy, but I have never found this texture to effect the final product, and I believe that model paint binds better to this texture than the often smooth texture of a spray primer. Remember to dilute it with a bit of water to get better flow from the brush, and to avoid it clumping up. You want an even distribution.


Choosing your primer colour is just a matter of preference. A dark colour will show through your paints a bit more, and can lead to a darker, grittier vision, while light colours allow for easy vibrancy.
2. Basecoat
Basecoating is the act of blocking out the basic colours you will use. There are no fancy techniques here. You are taking slightly diluted paints and applying them in smooth consistent layers on each part of the model until the primer can no longer be seen. Paints with lower pigment count (like whites and yellows) often take many more coats to achieve coverage. While you may be tempted not to dilute the paints because they have better coverage without water, they will often clump and leave streak marks. For best effects, you will want to be patient and suffer through the additional coats... OR you can mix small amounts of colours with better coverage into the original paint (i.e. an ivory or tan into your white or yellow).
Basecoating is the large majority of this painting process. I would suggest starting with the lowest points of the model, and working outwards. When you are painting the deep crevices of a miniature, you often rub paint on other parts of the model. You can cover these marks later as you move outwards. When painting a humanoid figure, this often means starting with the skin tone, moving on to interior layer of clothing, and then outer layers of clothing/armour/accessories.
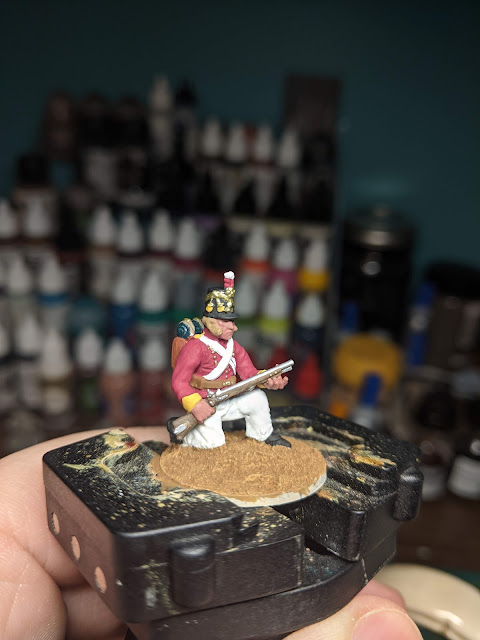
I will be using this British infantry model as an example (because it was what I was already painting when I decided to do this):

You can see that the face is lower than the surrounding features, like the hat, the beard, and the rifle. Even though I got flesh tone on the sideburns, I can fix them easily because they are raised.
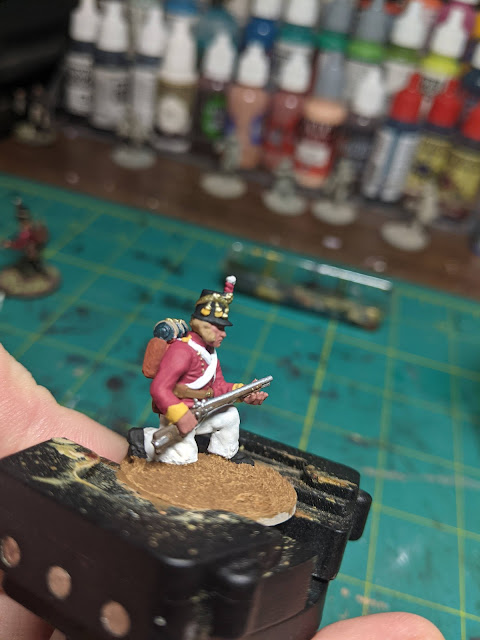
Next, I started the uniform. I just painted the whole torso red, even though there are lots of little details, because the buttons and straps are all raised details. Similarly, I did the red first, because I wanted to do white pants. I didn't want to paint difficult white pants and then splash red on them, so I started with the red. I took a few minutes before I started painting to think about which order I wanted to work through the colour, to avoid going back too many times.

Once you have all of the details covered, go back and fix any small splatters or mistakes that you want to correct. I think it is better to save these fixes until the end, as it allows you to move through the main body of your work a bit quicker.
This model looks pretty good with all of the colours blocked in, but it is also quite flat. There are many advanced painting techniques like glazing, feathering, and stippling that can be used at this scale to create light and shadow effects, but they take a significant amount of practice to master. For our next step, we will be using skill-in-a-bottle: washes.
3. Wash
Washes come in a wide variety of forms and mediums, but the general principle is that they are a very thin paint or ink with a flow-aid (something that breaks surface tension, like soap). The wash then finds the lowest points of the model and leaves the higher points exposed. This creates shadow! a quick coverage of wash over your base coat will create low, mid, and high points on the model, and immediately improve depth.

Many washes are based on acrylic inks (with added acrylic matte medium and dish soap),but you can buy pre-mixed washes from most paint brands. Citadel (GW) makes a great line of washes or shades, and every painter I know has a pot of Agrax Earthshade for browns, and Nuln Oil for blacks. You can also make your own washes out of oil paints and mineral spirits. Just heavily dilute your oil paint with mineral spirit, cover the entire model (or the specific area if you are using multiple colours), and then use a q-tip soaked in mineral spirits to remove the wash from raised areas. This is getting a bit advanced, but you will probably want to pick up a Citadel shade to start out with this skill.
To use the wash, take a larger brush (I use a #2) and pick up a good amount of wash. Apply it liberally to the model, covering every surface. Whatever colour you use, all of the models paints will be slightly tinted that colour. For instance, my white pants are going to take on a brown hue. For me, this adds a bit of weathering and character, and if there is too much brown, we can knock it back a bit in the next step. You can isolate sections of the model with different colours of wash, but a uniform colour helps to unite the elements of the miniature.
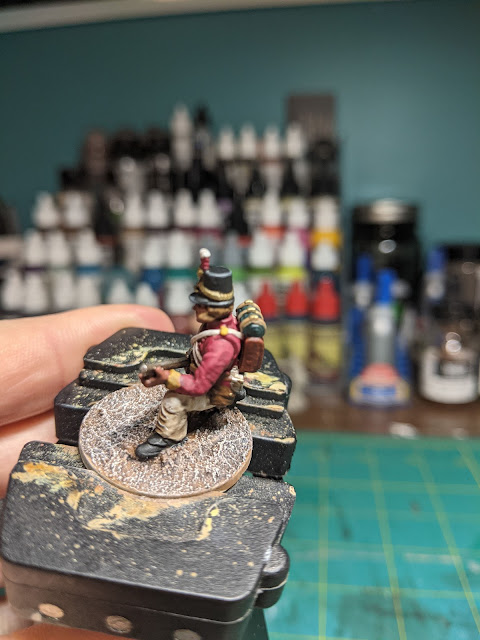
You can see in the following pictures how I work in stages, from the bottom of the model to the top. The was will pool in some low spots and become very thick and dark - wick away the excess wash from these pools. They can lead to excessively dark spots on the model. Again, they can be knocked back later, but this will save you some time.
You can see from the base texture (more on this at the end) how the wash flows into low points.


Compare the torso here to the previous picture. There is more definition in the uniform now.

The backside of the miniature illustrates how well this stuff works. We went from flat colours to a variety of light and dark on the backpack.

This picture shows the wash after it has fully dried. The wash has a bit of a glossier finish than the paint, but much of that will be removed by drybrushing or highlighting the raised points later.

Many people choose to stop painting here. All of the colours are blocked in, and we have created the illusion of depth, all with very minimal effort. No advanced techniques were employed here, just solid coverage. However, we can create a bit more contrast with...
4. Drybrush or Highlight
I have included both drybrushing and highlighting here, but they are both methods of doing the same thing - catching the raised points on the model with a lighter colour. Many people do one or the other, but I tend to do a bit of both. Highlighting can be a bit tricky, so if you aren't confident with your abilities and you like how your model is looking, maybe just try drybrushing. I do think that highlighting is an important skill in miniature painting, and it is worth taking the time to practice on a test model, as it leads into a variety of other skills.
Drybrushing involves taking a dry paintbrush, preferably a wide one with shorter bristles, adding undiluted paint, and then wiping off 98% of the paint on a paper towel, and then dragging the empty brush lightly across the model. Usually you want the drybrush colour to be a lighter hue of a paint that you have used previously. Sometimes this means mixing in white or a lighter colour, but if you just used a dark wash, then your initial paint colour will probably be brighter than what is on your model. Alternatively, I have found great success in using an off-white, bone, or khaki colour to drybrush the entire miniature. When highlighting dark colours like black, a lighter grey does not always reflect how the raised point of black fabric would look in daylight. Using an off-white is also unrealistic, but is very high contrast. Remember that most of the time you are looking at your miniatures, they will be on a table, 3 to 4 feet away from you. A subtle grey highlight won't be visible, but an even lighter colour will be.
The white highlights stand out on these brownish pants when you get too close, but from a distance, you can only see the contrast.


Here is a #2 round brush, a wide brush for drybrushing, and an old makeup brush for drybrushing larger objects.

This leads nicely into highlighting. similarly to drybrushing, you can take a lighter hue of the colours you have already used, and paint the raised edges of your miniature. In most cases, you only want to hit sharp edges with this technique. You also do not want to use the tip of your brush - rather, you want to drag the edge of your brush along the raised point. I have found that the key to this technique is moving the brush *incredibly* lightly. you want to almost miss the model entirely, and just catch the brush very briefly. If you press the brush into the model, the paint will spill over the sides of your raised point, even if you are using the side edge of the brush. A light grazing will yield a fine line.

The last aspect of highlighting is the most difficult, and where I always make mistakes. This is highlighting flat areas. We can look at the red jacket on this soldier to illustrate. The sun is probably somewhere above the soldier, so the jacket should appear to be lighter on the top where it is hit by the sun, and darker on the bottom where it is shielded. To create this effect, we take our original red paint, and hit some of the areas that would be in sunlight. Remember, our original red paint was darkened by the wash, so this plain red paint will be a hue lighter. because the colours are so close, we don't need to worry about creating a smooth gradient.
You can see in these pictures, the almost pinkish looking red lines on the uniform. This is the exact same red I initially used, it just looks a bit lighter after the wash. Again, from a distance it will not be so stark.


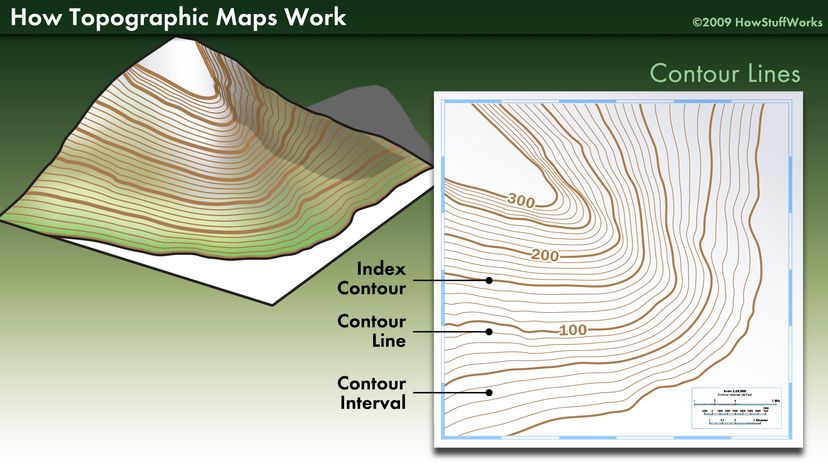
Some painters will mix several hues, getting progressively lighter and working inwards. They dark colour covers the largest portion, then the lighter colours each fill in the receding area, kind of how a topographic map looks.
This can take a long time, and sometimes leads to a bit of a cartoony style. Another way to create this contrast is through a technique called wet-blending, but I won't cover that here.
One last point about drybrushing and highlighting: less is more. It's easy to get carried away highlighting edges and creating contrast, but you don't want to start creating light in unnatural places. Our eyes are really good at perceiving when light effects looks wrong, and often it is just better to leave this process to the wash.
5. Finishing
This can be as simple as painted a black (or any other fun colour) ring around the base of your model:

I also like to use a matte varnish to protect the miniature. Usually just a thin coat over the whole model. This isn't really necessary, as all of the coats of paint and wash should cure fairly well. If the models get used regularly with greasy fingers, you may want to varnish them.
The last step I usually do is a dab of white glue, a grass tuft, and some flocking grass. Sometimes I use snow flocking, or I do martian red clay, but generally I just stick to the basic brown earth and green grass look.


And here we have a finished table-ready miniature!
One other note I should mention is the basing texture. This being the sand or rubble at the feet of the miniature. You can buy products like Agrellan Earth or Stirland Mud which replicate ground surfaces, but you can also just cover the base of the model in white glue and then sprinkle some fine sand onto it (just make sure to seal it again with a bit more glue and water, and then prime it).
Similarly, flocking (or fake grass/moss) is easily created by stirring in a bit of green (or any coloured) craft paint into some fine saw dust, and mixing well. Just start with way less paint than you think you need, and try to keep the sawdust from becoming wet and thick. A little paint goes a long way here.

This was so informative, and I learned things I hadn’t seen before. Also, you do an exceptional job of describing not only the steps, but what to look for as well, really helpful!
ReplyDeleteLooking forward to any further posts — also we should paint some stuff together some time! :)